
I'm sure you know what Baby Legs are. They are normally between $10-20 a piece if you buy the brand name. You can get them on sale sometimes, but it can be challenging to catch the awesome deals just right. So I started searching for tutorials on how to make them myself out of cheap socks you can buy at Target, Walmart, Dollar Store, where ever! There are lots of Tutorials out there on how to make baby legs. There is one at Calico that shows you how to make a ruffle edge, one at Everything Your Mama Made, and one at Little Birdie.
I didn't like how most of the tutorials I found make the leggies so it has a cuff, but the cuff isn't smaller than the rest of the leg warmer part. Having the cuff a little smaller/tighter makes for a better fit and helps it say on the baby's legs better.
There is this tutorial - which almost all other tutorials seem to
point to on Flickr by Baby Hopes. This is a GREAT tutorial. But I am easily confused sewer. I like things very easy and as few steps as possible. So in this tutorial when she cuts something in half and it just confused me a bit in pictures 4-7.
So even though there are lots of tutorials out there, I'm making my own tutorial to show off my less cutting, more sewing, method of making these baby legs. I think the way I do them saves a little time and less measuring. Here is my tutorial!
First start with a pair of knee high socks (ladies or girls work).

Cutt off the foot from just above the heel.

Leaving you with this:

Next cut off the rounded toe part of the foot. (Usually I do both feet at the same time to save cutting, but for pictures I did one at a time.)

No more toes!

Next, cut off the rounded heel part.

In this picture we only need the middle piece.

Our cheapo socks - deconstructed for our baby legs.

The leftovers. Trash...or find some other use for them if you can!

Turn the cut off foot part inside out.

Like so.

Good job, they're both inside out now.

Stitch about 1/4" in on both sides of the foot part. This is making the cuff smaller.

One side done! It doesn't have to be exact...as my photo clearly shows. ;-)
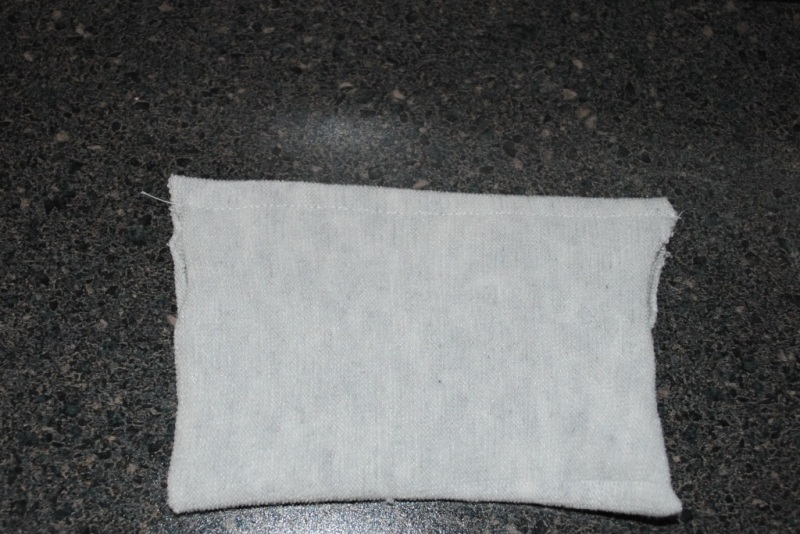
Repeat the 1/4" seam on the other side of the foot part.

There we just choped off about 1/2" or so from the cuff.

(Repeat on other foot pice.)

This part can be skipped if you feel like it, but I usually do it. Trim the seam on the outer side of the 1/4" seam you made on both sides.

Look, it makes fun curly Qs. =)

It will leave you with ragged edges on both feet part.

Use a small zig zag stitch up the sides on both feet to seal in the edges and prevent the cuff from unraveling from the inside on the babys leggies.

Ready to assemble. This is the part I hate the worst because of the pins. I am injury prone...pins can be sharp!

Now, turn your inside out foot piece right side out again. Bring both of the raw edges together so only the "good" sides can be seen after it is all sewn together.

Repeat on the both socks. (duh)

Take the cuff you created and put it over the long leg part of the sock and meet up the raw edges. I tend to match up the seams on the fold of the sock that already exists.

This is where I usually pin myself...Pin all the raw edges together as close to meeting up as you can.

See, doesn't have to be perfect, just pretty close.

Get both out of the way now so you only have to pin once then just sew and finish up.

Sock sandwiches ready to sew!

I do a close together, medium length zig zag stitch all the way around the first time. I stiched on the "inside" of the sock because it seems to save my fingers from the pins a bit more than if I was sewing on the other side.

Sew one zig zagged row around the leggie. This is when I check for little pieces that were missed on the good side and make sure they get caught in my second go around.

Do one more zig zag around for safe measure. I do the second zig zag a little longer, but the same closeness of stitches.

Here is what the finished cuff looks like. Repeat on the other leggie.

Voila. Baby leggies.

Doing this without taking pictures takes probably 5 minutes after cutting.
If you have a pair of socks that has a pattern that only continues on the TOP of the foot it is slightly more challenging to cut and piece together. It will maybe add a few minutes to your project the first time and you will be a pro in no time.
Picture with baby leggies being worn by the Alligator...


Picture with baby leggies being worn by the Alligator...


Cute Idea! Returning the follow from To Spend Or Save!
ReplyDelete